Scanning & Printing
For about two years, and for the majority of my 35mm image catalog, I used the Nikon Coolscan 4000 ED which features 4000 ppi resolution, and, perhaps more importantly, a dynamic range of 4.2. This allows considerable shadow detail, and the ability to handle the most difficult positive transparencies from Kodachrome and Velvia films. I used the Nikon Scan software as a plug-in to Adobe Photoshop.
When working towards prints, I scan the originals at the maximum resolution and word lenghth allowed by the scanner (4000 ppi and 16 bits per color channel), then after cleaning up the image (removing scratches & spots, etc.), I then do whatever other post processing I find necessary. Typically, I use Levels, Curves, Color Balance and Saturation tools to approach the overall image density I'm looking for. From there on, I use layer masks to increase the precision of localized tonal values and contrast. Once I have adjusted the image to bring out the best tonal values and relationships, I make a version for printing by resizing to the target print size and resolution.
Although I have now use a digital camera (Nikon D7200) for most of my work, I did a lot of scanning over the years. For medium-format or larger scanning, I have used a
variety of different machines, depending on availability
and quality requirements, including the Nikon
Coolscan 8000 ED. To scan images from 9x12cm originals,
my father has helped me with his Epson
2450 flatbed scanner. This unit works well for larger-sized
negatives, and is particularly good with B&W originals.
However for smaller, color negatives and positives I find
that this scanner introduces some noise and color registration
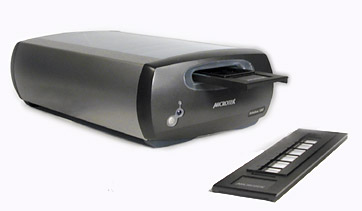
artifacts. For about 15 years I owned a Microtek
Artixscan 120TF and the results were quite good.
I haven't done high-quality printing in many years. The challenges with drivers, inks, and media finally wore me out. If I have to make a print, I find a local pro.